
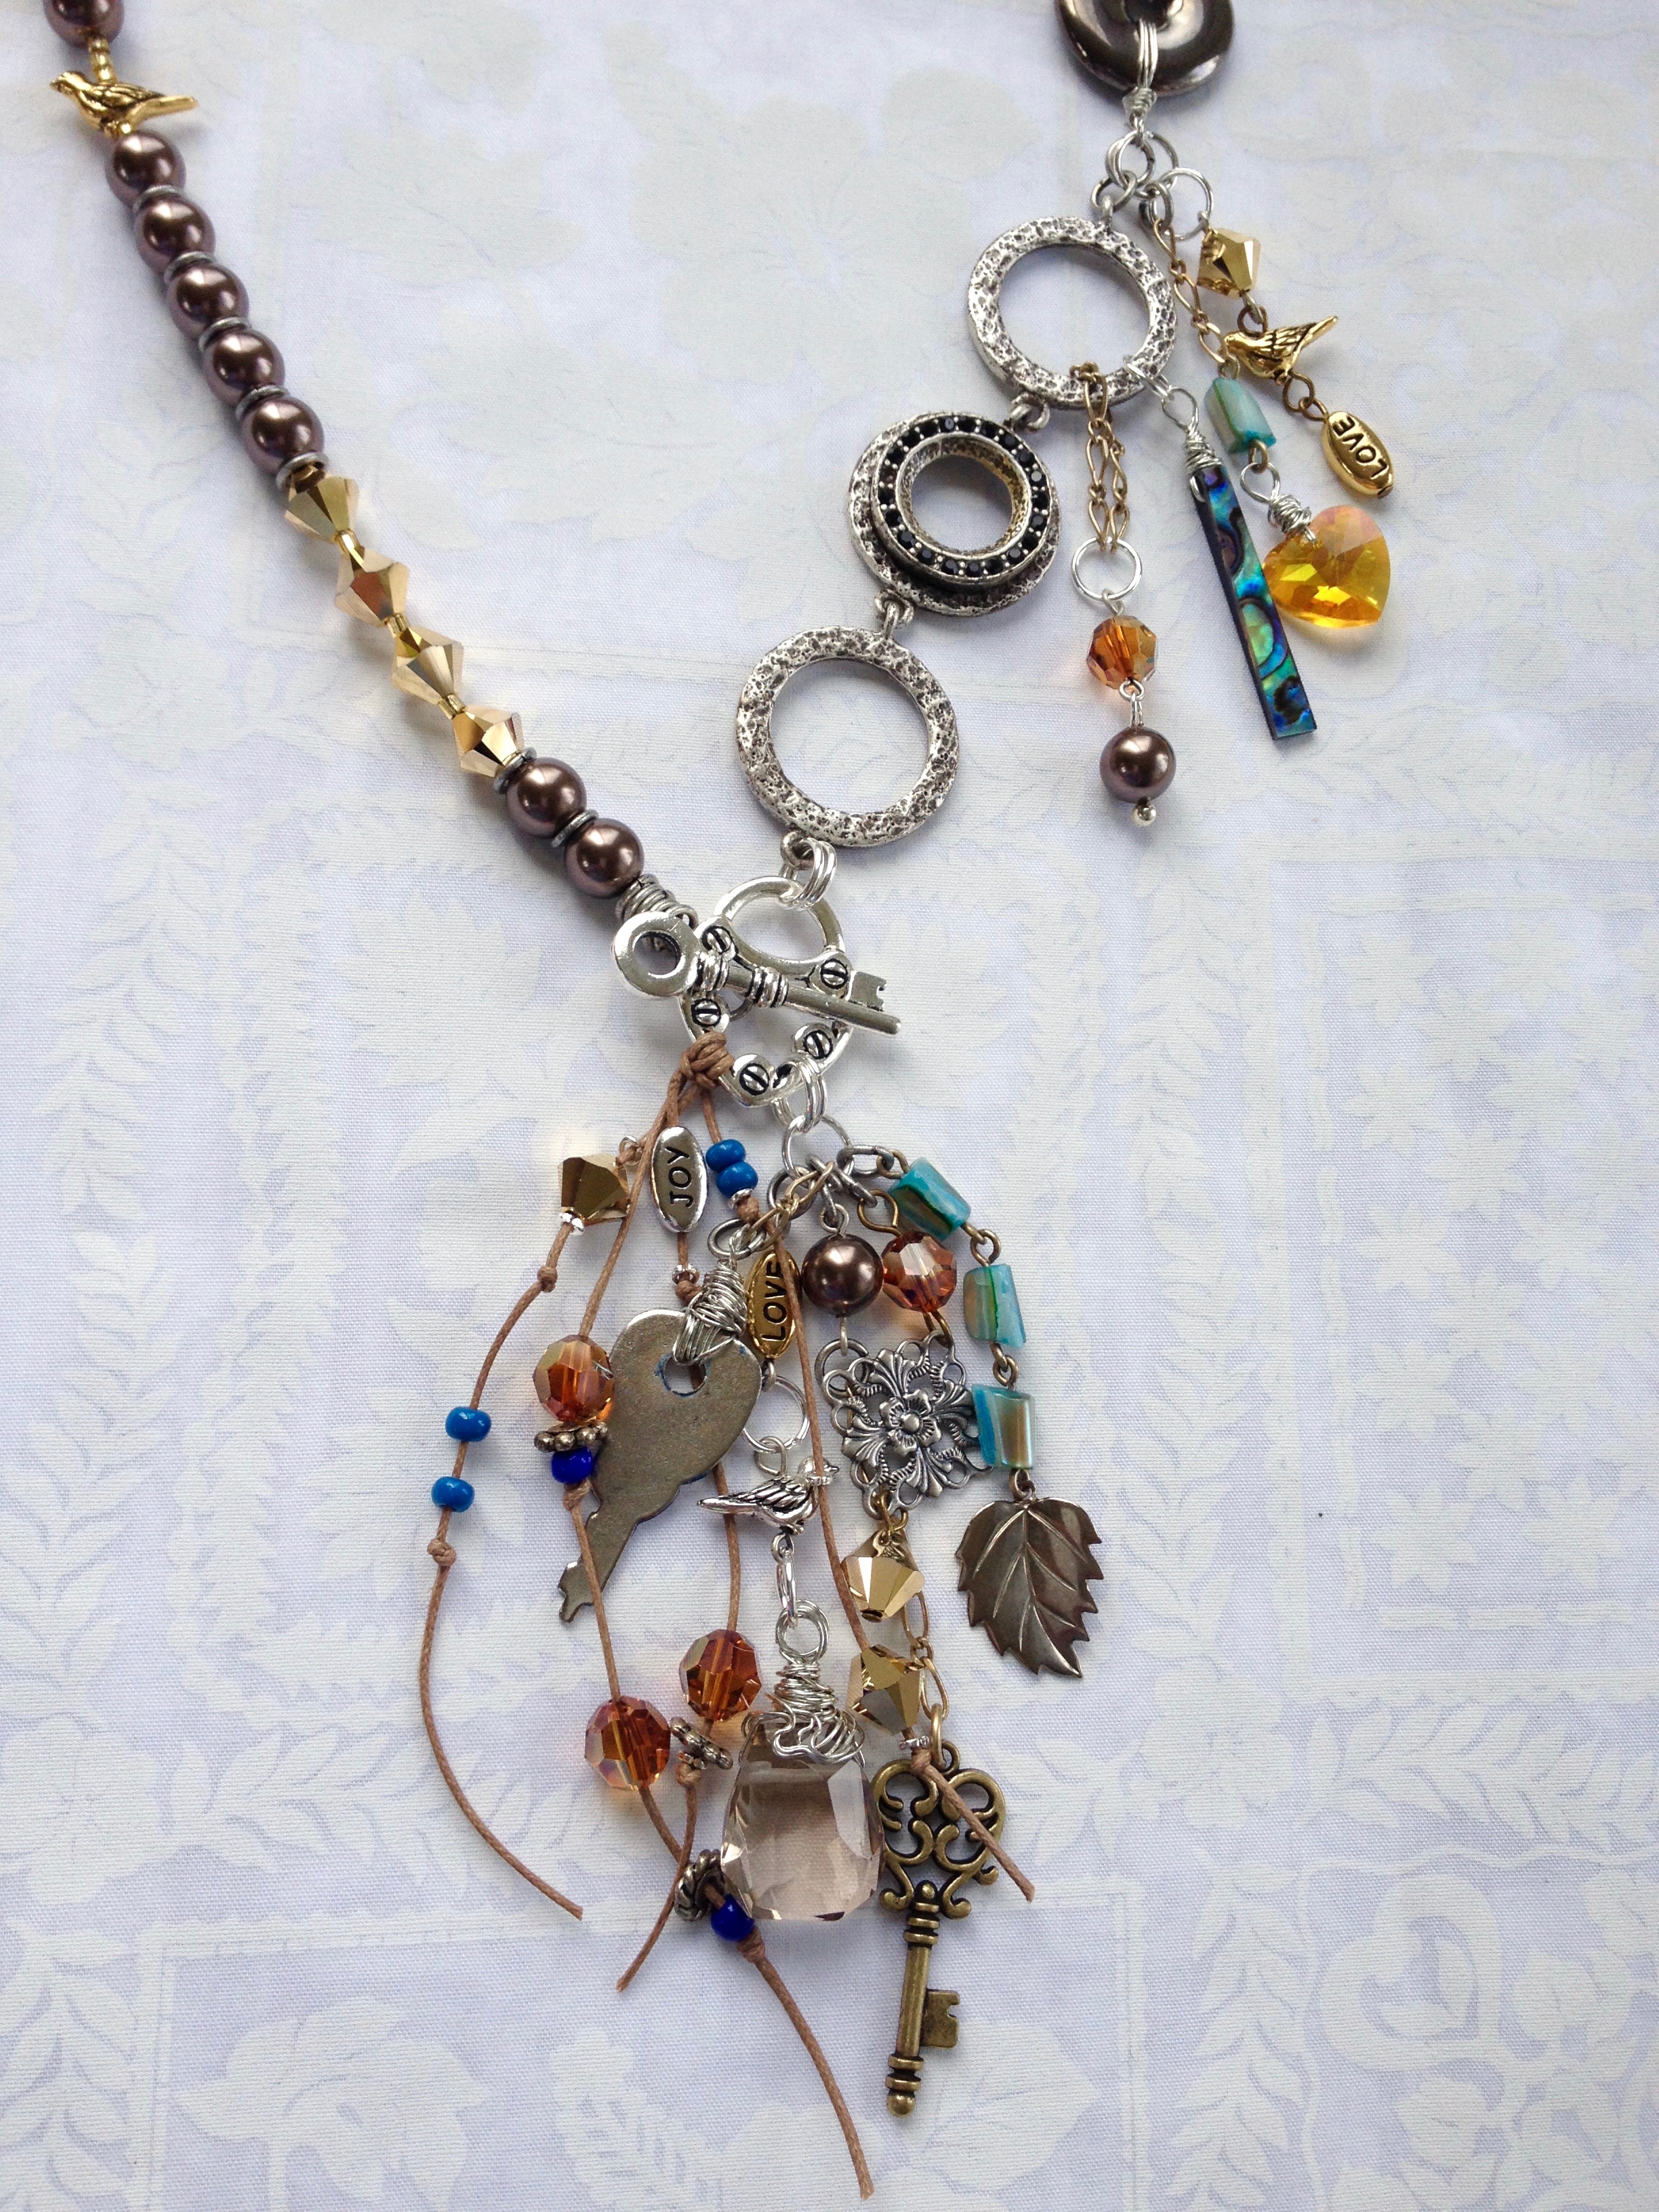
Finished necklace.
For a while now I’ve been resisting making jewelry. Many dozens of excuses! Finally, I called a friend for help and I am so glad I did. Help was so important to get me past that stage of not even knowing what I kind of jewelry I wanted to make. Some excellent reading materials were provided to me and I studied them.
Here is a picture of the finished piece that I’m highlighting. Click on any picture for a larger view.
While looking through the jewelry supply catalog, I spotted a project I wanted to make. Picking a project to make got me past my instinct to design something. As much as I love designing, to get started I just wanted to practice the making. Sort of awkward anyway, to attempt to design something that I have no idea how to make. Something had to come first. And as it turns out, the design I liked determined the techniques I wanted to learn. Felt good to finally get off of square one.
Because the (two inch thick) catalog was a little dated, some of the supplies for my chosen project were sold out. Others cost more than what I cared to spend. This was perfect, it gave me the opportunity to make the necklace my own instead of following the design exactly. Win. The design appealed to me because I have a tendency to make things too even. This one is definitely apart from my usual rhythm. I’m not sure if I really love the asymmetry as much as I crave irregularity, but I’m getting that figured out.
After studying a photograph of the design I wanted to make, my wonderful wonderful friend, Charlene, combed through her collections and shot me back photographs of charms and ephemera curated just for my project. I was thrilled to choose several absolutely perfect pieces from her photos before I decided what I still had to purchase. I decided on several items from the materials list, relying on that information to get the correct gauges and sizes for this scale and type of project.
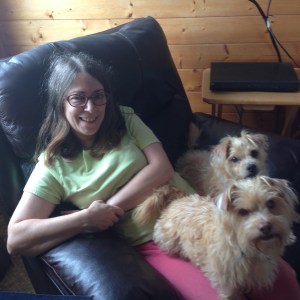
Me with Sissy and Buster.
Before long, the day had arrived for me to pick up my tools and goodies and head on over to Charlene’s for my lesson. Here I am with the fur babies, Sissy and Buster. Miss Bird was feeling camera shy and declined to be photographed. In this picture I’m being given a nice pep talk by Charlene before we get started.
This project involved some wire wrapping which I’ve wanted to learn and assumed was way out of my reach. The wire wrapping lesson was so much fun. I wanted to wrap everything! Beforehand it seemed like a far away mystery but I was given some special secrets. Such as, in every project something is expendable. In this case, the wire is expendable!! Take off more than I need and toss the extra. Start over and don’t worry about saving the bent wire. Practice. At one point Charlene said, when I show you how to tighten the wires you are going to say “ohhhh” and she did and I said “ohhhh” right on cue, it was involuntary, really. We both laughed. Silliness.

In process.
After a few hours of advice and instruction, and several charms and components richer, I went home to assemble. I had been encouraged to expend wire and I did. It took several attempts at wrapping to feel that it had the look and security that I wanted. To achieve a stronger loop, I decided it was easier to use a double strand rather than a thicker wire, at least this time. I spent the rest of Friday afternoon wrapping and hooking dangles together. Rearranging the possibilities. I was surprised to discover it was 6:30 pm and I was still in the studio.

Beads and baubles.
Saturday morning I sat down and got serious about the assembly. I don’t have much for process photos. I really didn’t know what the process was yet! In above photo, the main part of the necklace is completed and I am adding the dangles. Still deciding which parts to hook together. The beads are strung on a crimped beading wire. The rest is assembled with jump rings and other findings.
Here is a picture of some of the components I worked with. An assortment of bought, found, and made items were used. The large chain pictured is actually a lightweight nylon-covered rubber chain. Very easy on the neck. An assortment of jump rings, head pins and eye pins are what I used to assemble the necklace and dangles. In this project I used a variety of metal colors and I’m enjoying the the mix. Also, gotta love the many “antique” colored metals available, no polishing required.
There were some surprises. First, because I was facing the work, I made a mirror image of what I thought I was doing! Later, I discovered it makes a delightful little clinking noise when I put it on and move around. Like an itty bitty wind chime.
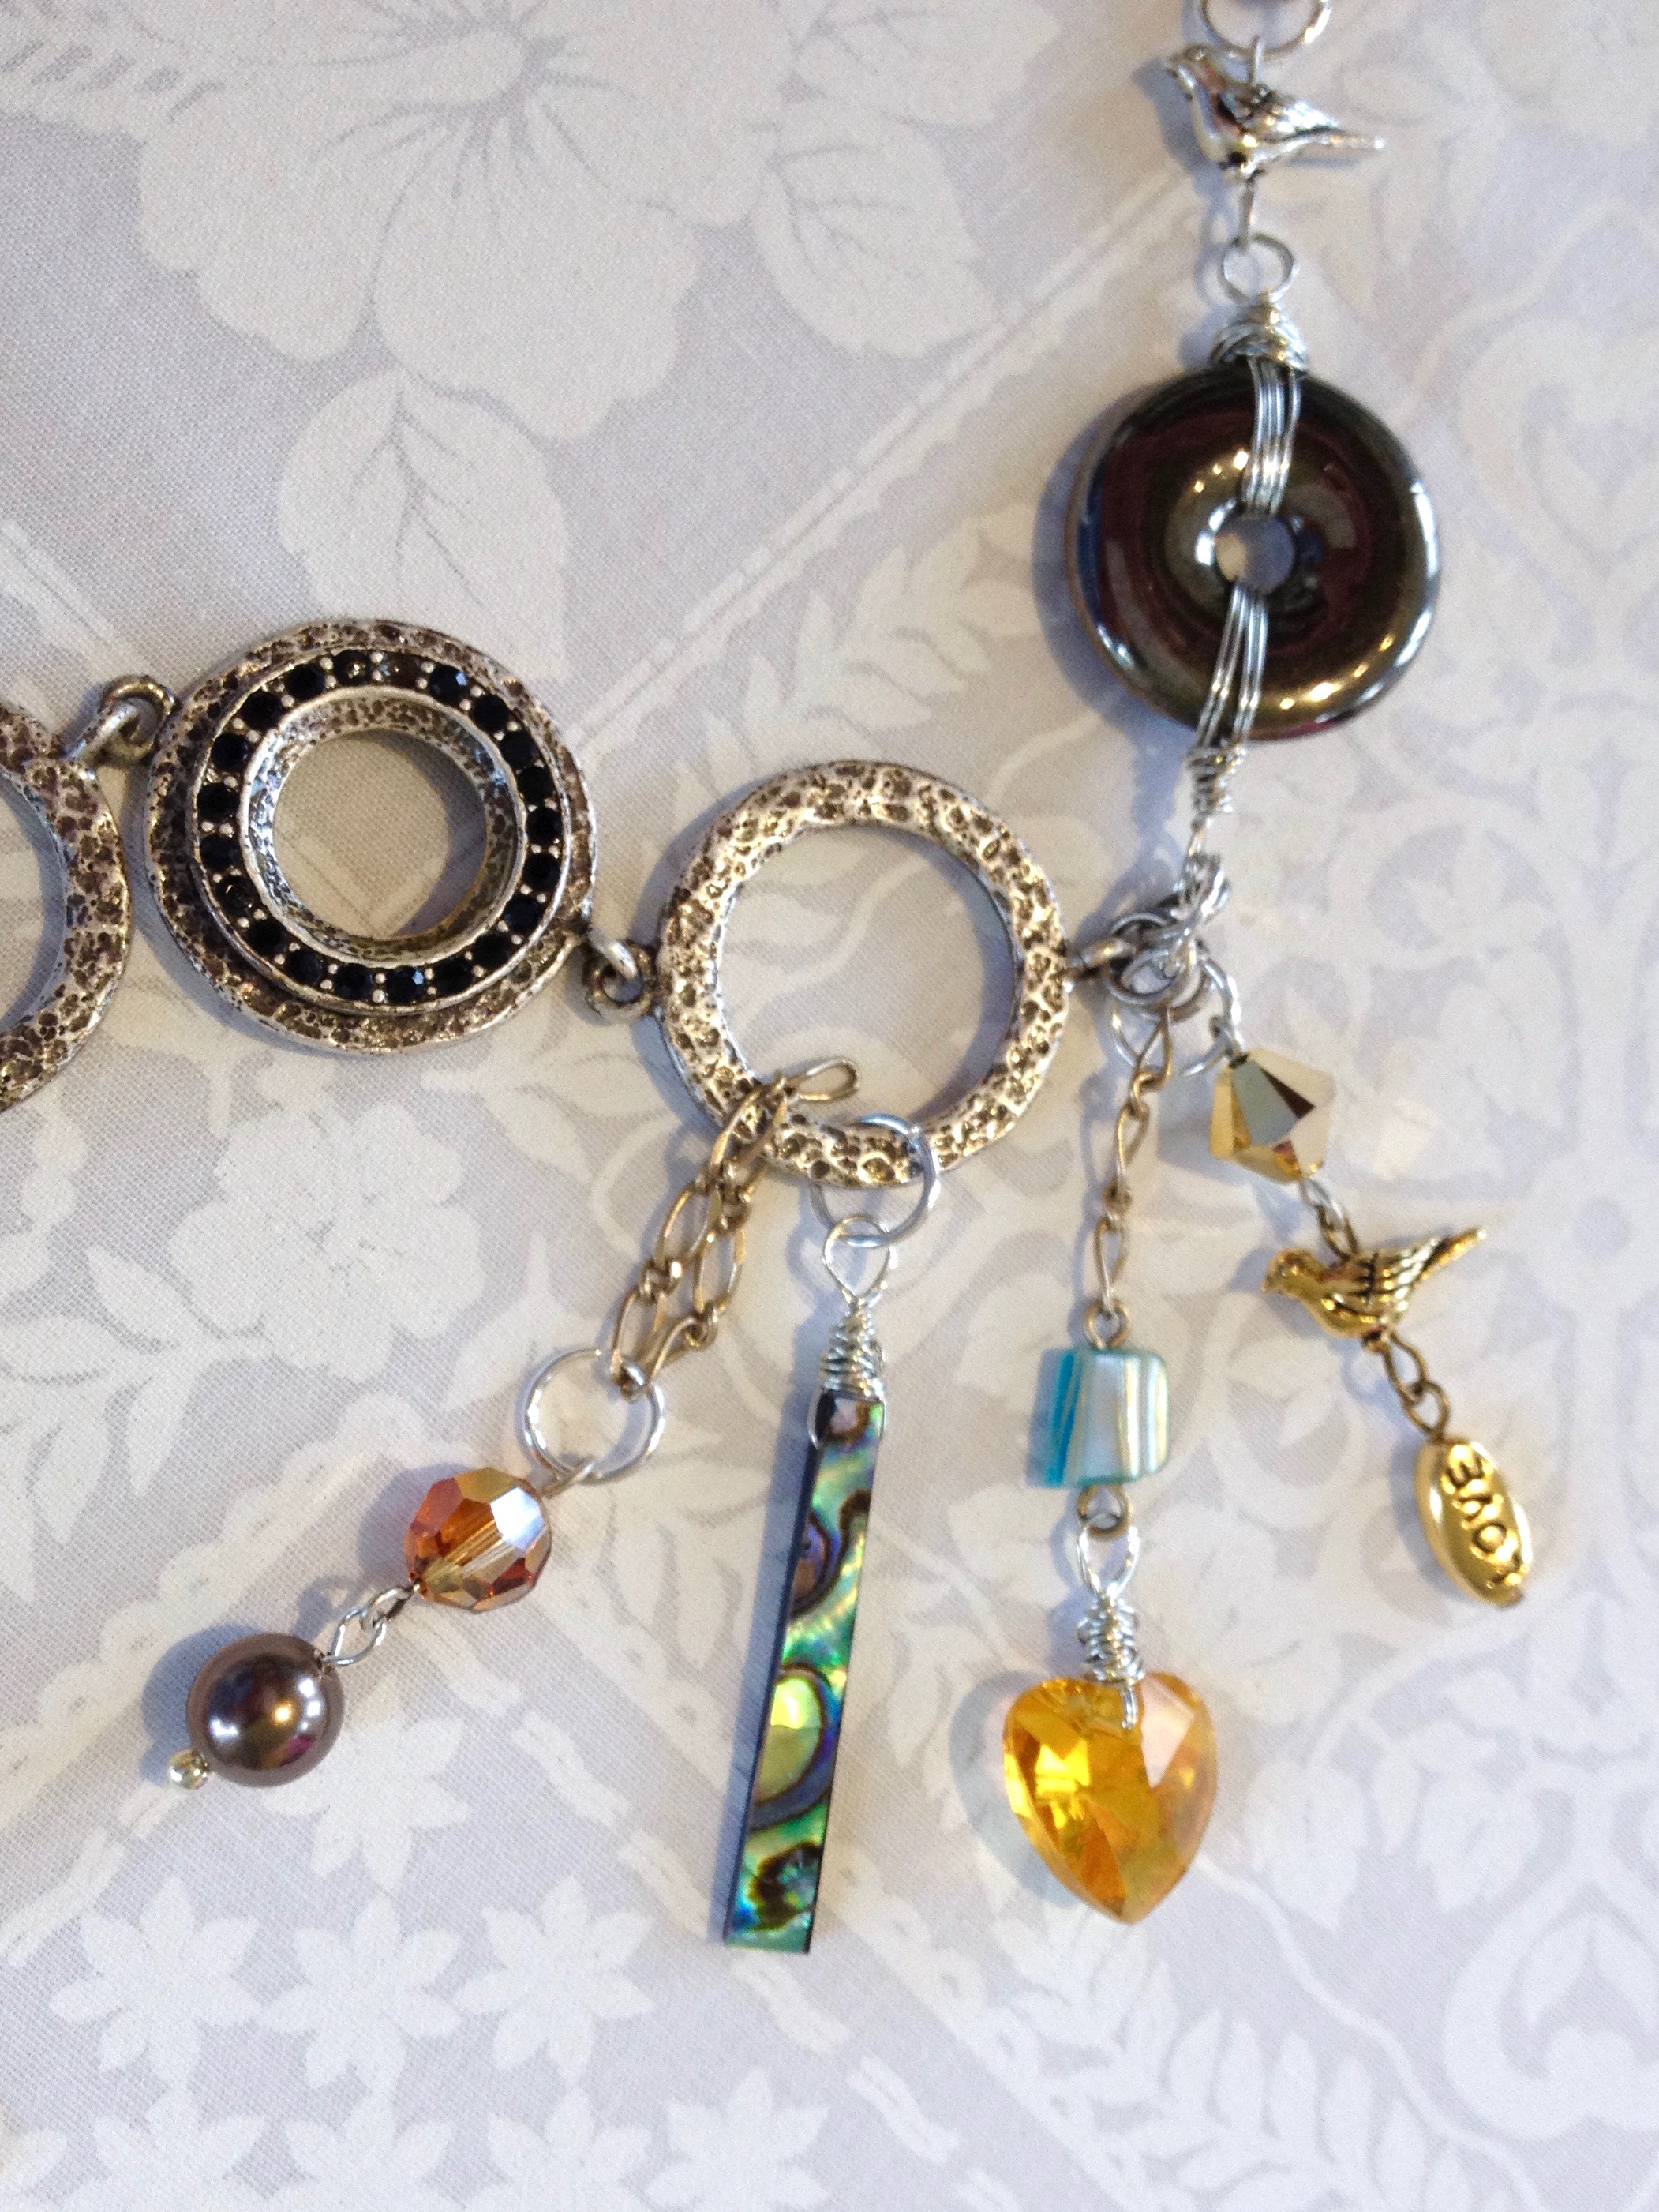
Below are some closeups of the dangles and wire-wrapped components.

Now I’ve decided that jewelry making is definitely going to be one of my things that I do. I love that it is a quiet job. No power tools. No chemicals. I get to take my time making decisions and can change my mind without leaving a trace of correction behind. (Even if I have to expend a few jump rings to get there.) It took several tries to get the dangles at the bottom to hang in the order I wanted them. I just kept taking the components apart and rearranging the findings until I was satisfied.
Even with all the fussing and re-doing, I wrapped it up Saturday afternoon and felt very good about the experience. I deeply appreciate having this clean studio to work in and clean tables to spread everything out onto. So many thanks go to my sweet husband who gave me the fabulous gift of this beautiful studio.
I’ve tidied up for now but am keeping the tools and supplies close by and dreaming up some new projects.
Thank you for reading my blog!
Aloha, Alexis
