Enjoy this tiny sweater fashion show. So much tiny style!


It’s been a full and busy year. Overwhelming at times. Crocheting tiny sweaters helped me through it all.
I really love miniature anything. At first, I didn’t know tiny sweaters were already a thing. Apparently, I stumbled into a “thing” by just having fun.
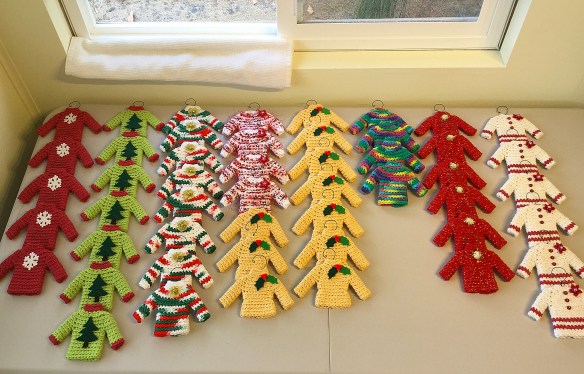
“Just having fun is a worthwhile endeavor!” according to my sister, Judy. Guess I can go along with that. I feel happy each time I finish a tiny sweater and I think it’s because of how cute they are. In the last five years I’ve crocheted over 250 tiny sweater Christmas ornaments.
I started by checking out a few different free patterns before developing my own. If you like to crochet, click [here] for my easy and free instructions to make a tiny sweater.

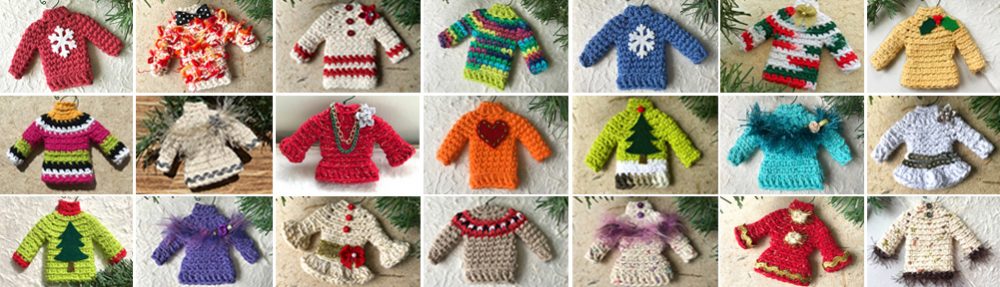
Tiny sweater ornaments in bright festive colors
After some refinement, I’m pleased with the shapes and proportions. Plus, now I’ve memorized the patterns. Not many things are as satisfying as being in that kind of flow.
Earlier this year I decided to crochet. To restock the popular and already sold out styles. That seemed reasonable. I didn’t expect it to take very long.
Then I got pulled into the rhythm of counting stitches. I find this very soothing. Meditative, even. A good enough reason to continue for a while. Maybe make a few extra.
Next I had cataract surgery on both eyes. This limited some activities while I waited for my vision to stabilize. Meanwhile, I had reading glasses that were the perfect strength for close-up work. Another reason to keep crocheting so I did. I love being still and productive at the same time. Crocheting lets me do that.

Yarn to go
By summer I was getting on an airplane and flying to the mainland. Leaving behind my island home brings with it a certain amount of separation anxiety. It’s to be expected. I knew from my last trip I’d be happier if I had some yarn with me.
My brain had a lot of information to process with the multiple family reunions and reconnecting with old friends. Crocheting helped me feel grounded and resist the urge to fidget.
Once back home, more crocheting through the rest of the summer. It seems like several times I said was going to put my supplies away and then kept crocheting instead.
In answer to the question, what have I been up to, lately?
Somebody should have stopped me right about here. I don’t know who “somebody” is, but I wish I did! I did not stop here. Nope. I still had a few styles I wanted to try.
One morning I got a text from Judy asking how was I doing? I had been pondering a question. So I texted back these two pictures of the natural white sweater and asked which bow she liked best.
-

- Do you like it with the red bow…
-
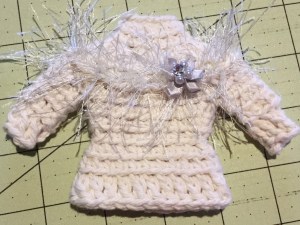
- Or the silver?
“What if you added a belt?” she said, “Don’t decide now, just look at it.” Usually these things are decided by the materials I have on hand. This metallic silver trim goes perfectly with that over-the-top eyelash yarn. As a minimalist, I wouldn’t have instinctively added so many details but I love it! And I made several more just like it, too.
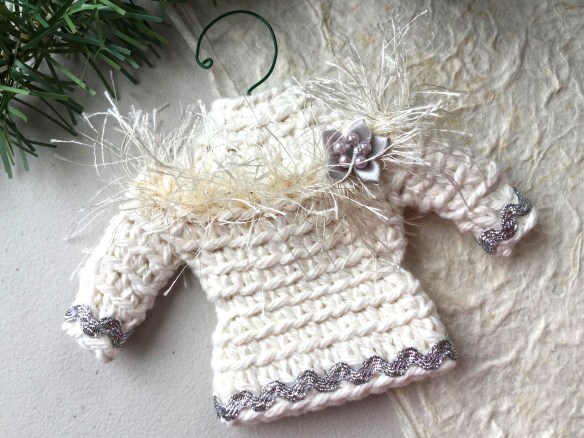
Sweater ornament in natural white with metallic silver trim
It’s been so cool having a design consultant on staff. Especially since she’s proclaimed herself as one of my biggest fans. To prove her point, and without even thinking about it, she can rattle off a long list of my products that she owns (placemats, napkins, towels, wallets, jewelry, sleep masks, etc.). Thank you, Judy.
(And, yes, that’s a shameless plug for other items you may find at Alexis Art Studio.)
Our next design together was a his and hers sweater set. I’d been drawing a blank on what would make the perfect men’s style. That’s when Judy came up with the necktie idea. So cute and totally “crushed” the concept I was going for! She loved the prototype so much that she pre ordered four sets. That set me off on another crochet spree.
-

- His and Hers sweater ornament set in red with metallic gold.
-
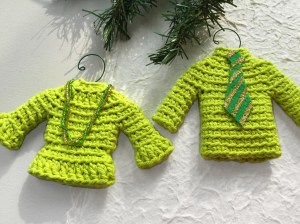
- His and Hers sweater ornament set in green with necklace and necktie
-
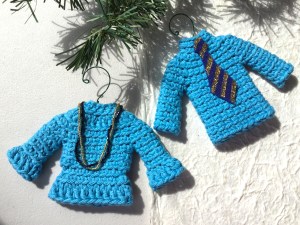
- His and Hers sweater ornament set in blue with necklace and necktie
Later we played with a bow tie idea. We worked on it for a while, texting pictures and exchanging thoughts. After all that, I decided I liked the necktie better. It came to me in a moment and I just knew…
Repeating a great idea was going to feel better than introducing an okay idea just because it’s new. It’s one of my ongoing struggles as an artist. I’ve expended a lot of energy trying to be original all the time and finally realized it’s so unnecessary.
Making lots of sweaters also means making lots of little hangers. They’re bent from florists wire, one at a time. That’s why I’m so thankful for this jig that my husband made for me. I bend the wire around it to get the hangers a consistent size and shape.

Jig and wire for making tiny hangers
Each sweater has a studio label inside with Made in Hawaii. Additional details about each ornament, the colors, and embellishments, are in the individual listings.
Oh, sure, yes. The thought did come to me a few times that I should stop. Making. Sweaters. But then the next thought was: I can only sell them if make them first. Because most of the work was in styles that I’ve sold before, I felt (pretty) confident that the extra inventory would be crowd pleasing.
Come check out the cute and happy tiny sweater Christmas ornaments in my etsy shop
Thank you!!
Alexis
PS: Might as well get some for yourself, too. More than once I’ve had buyers tell me they were planning to give them as gifts but couldn’t bear to part with them. Just sayin’!