I’ve switched from dinking around with doll clothes to really putting my whole heart into it. After practicing diligently for some months though, I started collecting a pretty good pile of half finished outfits that just weren’t quite… I didn’t know. Whatever it was, I had determined I would figure it out on my own. Pretty much right up until the minute when I decided to take a doll clothes design class! Happy birthday to me! What a change. Thankfully, I was able to turn most my half made outfits into some that I’m really proud of.
Ultimately, I want to be able to see fashion, re-create it in doll scale, and then make my own patterns to sell. There’s so much to learn. Here’s where I am so far.
___
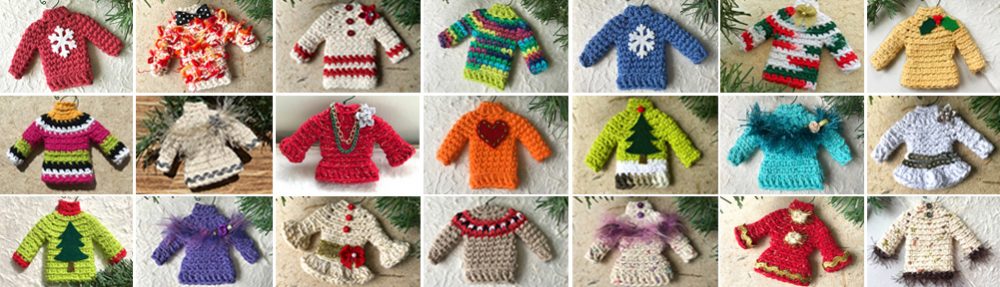
Spring and summer fashions for 18″ dolls are available for sale. More pictures and full descriptions of each outfit at Alexis Art Studio on Etsy . Most are one-of-a-kind.
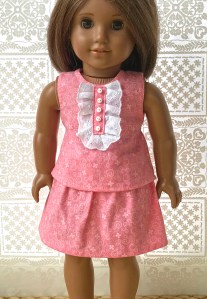
ABOVE: A nice length+width+focal point balance that I think really works for her. It took a few alterations before I got satisfied with this outfit and then suddenly I was. Tiny buttons really brought the scale into focus. But it was still an unflattering boxy shape until I added a little elastic shirring around the back. A matching skirt and I’m pretty sure I’m finished with this outfit…I think. Vintage eyelet lace is from my collection.
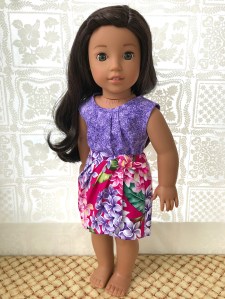
ABOVE: Sarong style skirt and gathered top just feel so authentically tropical. (Below, see two more color combos.) It was a pleasure to sit down and create this beautiful outfit with two excellent patterns from Forever 18 Inches. They came out great the first time without me having to puzzle out the design. Sometimes I really need that! The instructions included some new binding and finishing techniques that made me very happy.
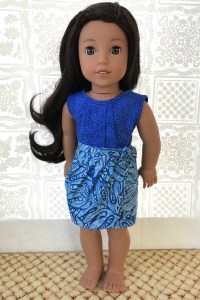
ABOVE: Also in blue. The drape is just wonderful thanks to the explicit instructions in the pattern. The wrap is faux. And the fit is adjustable with elastic in the back.
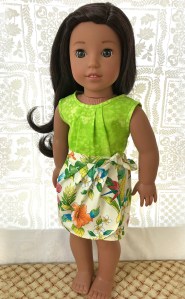
ABOVE: In poppin’ neon green and a delicate Hawaiian floral print.

ABOVE: I was struggling with this top at the time when I decided to start buying patterns for my continuing education. It was hard to get my mind around purchasing patterns when I’d just taken a class and what I want to do is design my own patterns. Glad I got over that because each pattern I purchase teaches me something new. And I get that much closer to designing my own with that much more skill. Anyway, the top went through several alterations. Too long, too short, just right. A simple skirt is made from the very last scrap of that fabric. Outfit complete. Nothing wasted.

ABOVE: I made several versions of this ruffle and ribbon embellished skirt. Trying to get the perfect fit…and that was before I learned how much the waist size of the American Girl dolls will vary. My challenge was to make a flat front waist with elastic back that doesn’t look like two different skirts. This took some experimenting.
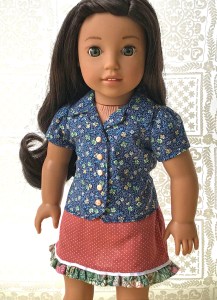
ABOVE: That skirt again, this time with a short sleeve button front shirt. The pattern that I’ve been working on for this shirt is pretty close. I like the fit and the length.

ABOVE: Another, earlier, shorter, version of the short sleeve shirt. Paired here with a longer pencil skirt. The waist is elastic. I cut the sides with a little bump at the hip that gives soft curves to the somewhat tubular shape of the doll.
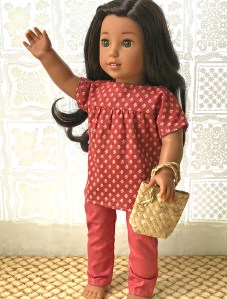
ABOVE: This dolman sleeve top is my first design post class. I wanted to develop it because the sleeves are easy to sew. In this version I think the gathers are a little too high. Chintz pull on jeans that intentionally don’t quite match are slightly imperfect in fit and drape. Still cute though, especially with a longer top. Up-cycled straw tote.

ABOVE: The dolman sleeve top again, with the gathers lower. Maybe a little too low? Hmm? Will keep adjusting until the question marks go away. The narrow leg pants are slightly imperfect in fit and drape. It turns out there are a lot of versions in my quest for the perfect jeans. Of course, too cute to toss, and this longer top hides the flaws.

ABOVE: My first attempt at distressing denim. In case you’re wondering, yes, it was a little stressful. After I sanded and picked threads with a tweezer, I put the finished skirt through the washer and dryer. Surprise, that final step really gives the distressing an authentic look. The midriff yoke top is the first draft of a pattern I’m developing. Was looking to create a little shape and wondering if I’d added too much. The more I look at it though, the more I like where it’s going. And that’s the value of waiting. Of not rushing into the next version. Easier said than done but one of the goals I’m working on.
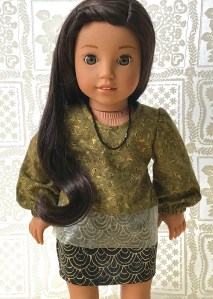
ABOVE: I’d been wanting to use sheer panels in the doll clothes scale ever since I saw it in a magazine. This little piece of sheer is up-cycled from an organdy gift bag. The outfit was good on its own but missing something. After I studied focal points I got the idea for the necklace. A simple string of beads echoes the pattern in the skirt.
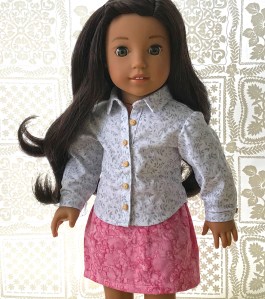
ABOVE: This amazing shirt from a pattern by Liberty Jane Clothing was a pleasure to make. The little cuffs have a continuous lap binding just like a real shirt. When I read the instructions for the cuff I thought it was impossible but I did it and it felt great! As you can see, my doll has all the confidence necessary to pull off this look.

ABOVE: Peplum top and narrow knee length button front skirt. Designs modified from Liberty Jane Clothing patterns. This top has several features that I really appreciate including the raglan sleeve and split neck. It did seem to be too long in the waist and too long in the peplum. So I shortened both the waist and the peplum and created the hi-low hemline at the same time.
___
Why else was design class so great? It wasn’t enough for me to just want to design the clothes. I wanted to ease my struggling and skip ahead to making awesome clothes. Not doll clothes but real clothes for dolls, as I learned. Class helped me narrow down my brand, style, and target age group for my designs. I was all over the place in those respects. Now I know a lot more about who I am as a fashion designer. That was a huge part of my struggle and I didn’t even know it.
For me to take a class at all required a major shift in perception. I had to convince myself that I’m a worthwhile investment. I had to go into it believing that I was “taking my awesomeness to the next level” (thank you to my sister, Judy, for the clarity of that quote). And I had to reassure myself that I was doing it because I’m smart, not stupid!
Another mental block to get past was thinking I didn’t need design class because of my graphic design experience. Oh wow, all I can say is that was just crazy wrong. My background helps, yes, of course it does. But because of the doll-specific focus of the class, I was truly enriched in the exact ways that I needed to be.
One of the most useful and surprising things I learned is that I can already draw. It’s lots faster to draw a revision than to sew one. A mindset change that’s a great big deal. It sure helped that we were encouraged to get a big eraser and use it freely. I like this better than the “old school” idea that good artists don’t erase. The floor of my studio was covered in eraser crumbs.
Next up for me is learning about specialty fabrics. I’ve done pretty well with the quilting cottons. Now it’s time to transition into apparel fabric. I’ll sometimes find myself stuck in the loop of what comes first the design skill or the fabric skill? A lot of times the answer is buying a pattern that’ll teach me both.
Also next, everybody loves shoes and knows that the right shoes can really make an outfit. So I want to start including shoes in some of my outfits. I’m considering purchasing shoes for re-sale at first, but eventually I want to make shoes and boots. And bags. And hats and scarves. Hair accessories, etc. All of it.
Thanks for reading my blog and checking out my artwork! Please let me know what you think!!
with love, Alexis
Visit me at Alexis Art Studio on Etsy
