I’m embarrassed to admit, I’m only now learning how to read crochet patterns. That’s after about fifty years of crocheting. I learned a lot in the making of this pattern. And, it’s called the Big Book of Tiny Sweaters for a reason, it’s got a lot to offer.
Why am I making a pattern now? Since I’m not an expert, it would be easy to feel not “enough” for this situation. On the other hand, I believe I’m extra sensitive to the worries and concerns of a beginner, since in many ways I’m still a beginner myself.
FAST FORWARD from my first tiny sweater fashion show in 2013 to today, March 2020. I’ve been crocheting tiny sweaters all this time. Hundreds of them. Over time I’ve fine tuned the shapes with an eye towards true human proportions and natural looking silhouettes.
This pattern has been tested.
ME to FRIEND: Would you be interested in testing my crochet pattern?
FRIEND: I don’t think I can read a crochet pattern.
ME: That’s the exact reason why you’re so perfect!
She did read the pattern. And her samples were so beautiful, it almost brought tears to my eyes.
The Big Book of Tiny Sweaters is a beginners pattern with lots of tips and guidance. It has my latest stitch counts. It goes into every detail with pictures and descriptions. Made to be easy to understand and fun to use.
Maybe even advanced crafters will appreciate how much it has to offer. Especially if they’re in a hurry. What?
If the PDF pattern is more than you need, try my online free tutorial and have fun!
Here’s some insight into my creative process on this project.
At first: A book of sweaters was not the plan, I was just taking notes for myself. I wanted to be able to remake sold-out sweaters without having to memorize each pattern. You know? I’d always eventually get there, but I wanted it to be more of a quick start. Although I felt good about taking the notes, at the time I definitely didn’t see that as a stepping stone to anyplace else.
Surprise: Last December I had a surprise mentor. “Thank you, Fiona” of Fiona Meade Crochet! After she shared my free tutorial over the holidays I had something really great happen: more visitors. The questions that came up during this time were so valuable because they showed me what needed to be clarified. And that’s when ideas for the book started to bubble up.
I was surprised at how good it felt just answering a few questions. There was a moment when I decided I had room in my life to be a student and a teacher at the same time. From there my confidence began to accumulate a little more.
Getting there: Going from “great notes” to “book” took me about three times longer than I thought it would. Initially, there was the exhilaration of getting all the notes entered into the computer. But then it wasn’t exhilarating the whole way. There was a tedious middle part. I started questioning my sanity when I couldn’t stop editing.
One of the things that kept slowing me down was thinking of important new stuff to add. Probably because we get our best ideas when we’re working. Even still, I think most artists understand that middle part of a project that feels impossible and, like, what was I thinking? Pushing through the sticky middle is such a relief. I’m not done yet but I can almost taste it.
Later, Fiona also shared an article from Dora Does about how to read and write a crochet pattern. It gave me a checklist. Happily, I was closer than I thought to being finished and starting to feel pretty good about my work. The best part is, if I’d started this project by researching how to write a crochet pattern, I would have been bogged down in too much information. Maybe forever second guessing myself. So the timing of the article coming up on my newsfeed was perfect.
Nearing the end now: Some really loving feedback from my sister, Judy, did a lot to help bring the writing into focus. She also patiently looked at, and commented on, countless cover drafts.
My sweet, and mechanically minded husband, read through the whole book. And while he doesn’t crochet, he gave me a couple of pointers that I think made the book even better for beginners.
Another aesthetically inclined and very tender friend read through a later draft. She encouraged me to be myself. And helped with some grammar, and solving an issue I was having with the headlines.
I’ve written about tiny sweaters before, here and on zenhensart.com. As you can see I’ve been on this journey a while now. In the beginning I didn’t know where it was going but somewhere along the way I found out making tiny sweaters makes me happy.
I’m always making too many sweaters and enjoying it so much that I have no regrets.
PATTERN DESCRIPTION
In this crochet pattern you’ll see step-by-step exactly how I make my wildly popular sweater ornaments. I’ve refined these patterns over hundreds of sweaters. I hope you’ll have a great experience with this pattern which is why I’ve spared no detail.
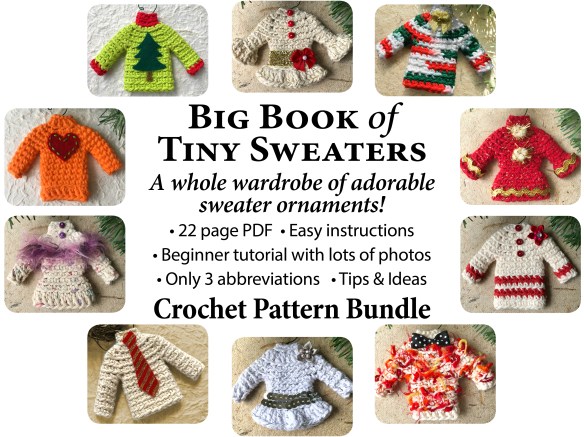
PDF file, 22 pages. Available for download immediately after purchase. May be read on your tablet or printed and punched for a 3-ring binder.
Fun to make. Crazy cute.
— Easy instructions
— Beginner tutorial with lots of photos
— Only 3 abbreviations used
— Tips, ideas, encouragement
The Big Book of Tiny Sweater Ornaments gives you the whole inside scoop. Instructions are illustrated to help you jump right in and start creating.
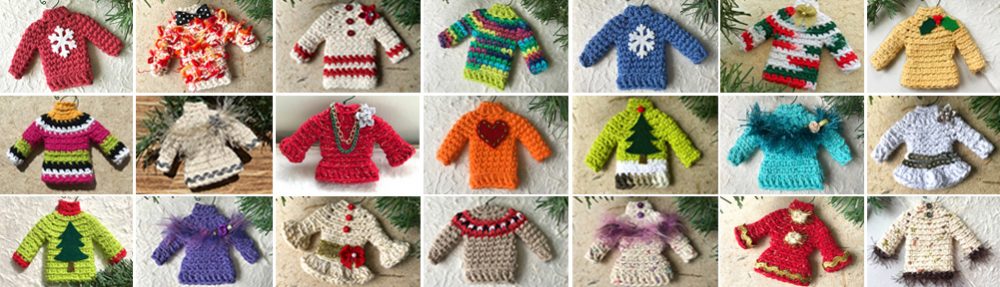
Specific instructions for all the variations you see on the cover, and more.
Discussion of embellishments for each sweater.
Helpful suggestions for creating your own designs.
Adorable sweater ornaments…
Three different ways:
- Free tutorial
- Big Book of Tiny Sweaters Crochet Pattern Bundle
- OR, ready made from my shop! Browse the shop or go directly to the sweater section.
Thank you for checking out my artwork!
with love, Alexis
PS: In case you’re wondering, YES, I do take custom orders when I can.


